Sample collection and wet-lab protocols
- Required materials
- Sample collection
- DNA extraction
- DNA amplification
- DNA visualisation
- DNA sequencing
- Activity navigation
Required materials
The following protocols give instructions on collecting plant samples and detail two alternative ways of extracting, amplifying and visualising DNA barcoding marker genes. It also provides advice on Sanger sequencing.
Materials required for wet-lab activity
The following section contains information on the equipment and consumables required for running the sample collection and wet-lab part of plant DNA barcoding.
We describe two alternative protocols for DNA extraction, amplification and visualisation, a “direct PCR” protocol and version which uses spin-columns. Alternative methods not described here might also be suitable.
Direct PCR protocol
General equipment
- Micropipettes (for a range of 1 to 200 μl; ideally P2, P20, P200)
- Micropipette tips, sterile
- 1.5 ml Eppendorf tubes, sterile
- Optional: Vortex mixer
- Table-top centrifuge (speed 20,000 x g)
- Eppendorf racks
- Bench waste containers for small waste such as tips
- Ice buckets and ice to keep samples cold
- Scissors
- Permanent marker pens to label tubes
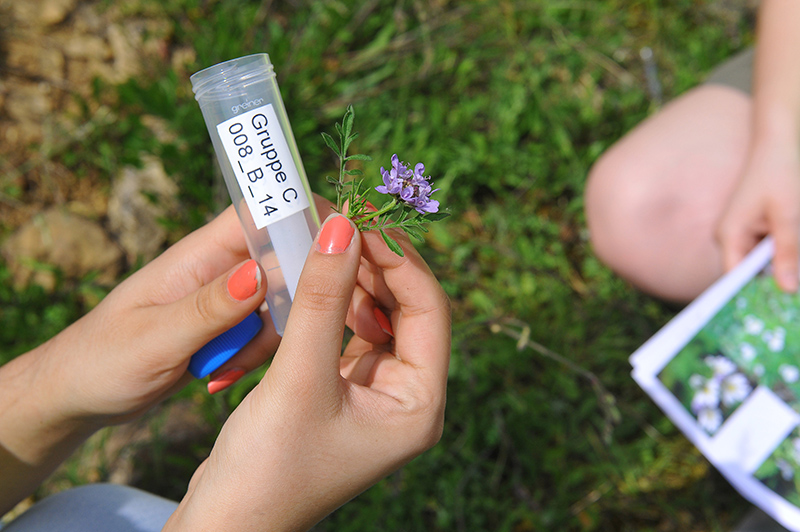
Plant sample collection
- Collection containers (e.g. 15 ml Falcon tubes), one per sample
- Sample collection record sheets (download), one per two samples
- Optional: smartphone to take pictures of samples and record their GPS locations
DNA extraction and PCR
This describes the materials you need when using the Lonza FlashGelTM System. Jena Bioscience Direct PCR Lyophilised Master Mix. Please note, the protocol described here is for a 50 μl PCR reaction volume. The standard volume supplied by Jena Bioscience is 20 μl; but customised kits with a different reaction volume (such as 50 μl) can be ordered.
- Optional: P1000 pipette tip to cut plant tissue
- PCR racks
- Thermal cycler
- Jena Bioscience Direct PCR Lyophilised Master Mix
(The kit contains DNA extraction buffer and PCR reagents (lyophilised dNTPs, DNA polymerase, buffers, stabilisers and BSA in PCR tubes, as well as an essential “additives mix“ in solution and RNase-free water.)
- Optional: micro-pestles, sterile (for harder material such as plant seeds)
- PCR primers to amplify rbcL and matK genes:
- rbcL primers (working stock: 10 μM):
Forward: Plant_Fwd_rbcLaf-M13 TGTAAAACGACGGCCAGTATGTCACCACAAACAGAGACTAAAGC
Reverse: Plant_Rev_rbcLa-M13 CAGGAAACAGCTATGACGTAAAATCAAGTCCACCRCG - matK primers (working stock: 10 μM):
Forward: matK-1RKIM Fwd-M13 TGTAAAACGACGGCCAGTACCCAGTCCATCTGGAAATCTTGGTTC
Reverse: matK-3FKIM Rev-M13 CAGGAAACAGCTATGACCGTACAGTACTTTTGTGTTTACGAG
- rbcL primers (working stock: 10 μM):
More information on the primers can be found here.
Agarose gel electrophoresis
This describes the materials you need when using the Lonza FlashGelTM System. Alternatively, you can use reagents/equipment for standard agarose gel electrophoresis. Note, in this case you may need to load a higher volume of the PCR product.
- General electrophoresis power pack
- Lonza FlashGelTM system: dock, camera, power supply and computer software
- Lonza FlashGelTM gel(s)
- Lonza FlashGelTM loading dye
- Lonza FlashGelTM DNA marker (e.g. 50 – 1500 bp marker range)
Spin-column protocol
General equipment
- Micropipettes (for a range of 1 to 675 μl; ideally P2, P20, P200, P1000)
- Micropipette tips, sterile
- 1.5 ml Eppendorf tubes, sterile
- Vortex mixer
- Centrifuge, speed-adjustable (20,000 x g and 6,000 x g)
- Bench waste containers for small waste such as tips
- Ice buckets and ice
- Scissors
- Permanent marker pens
DNA extraction
- DNA extraction kit
- Micro-pestles, sterile
- Falcon tubes
- Weighing boats
- 65°C water bath or hot block
PCR
- PCR reagents (e.g. PCR beads)
- Thermal cycler
- Sterile, RNase-free water
- Degenerate primers (working stock: 10 μM):
- Forward: Plant_Fwd_rbcLaf-M13* TGTAAAACGACGGCCAGTATGTCACCACAAACAGAGACTAAAGC
- Reverse: Plant_Rev_rbcLa-M13* CAGGAAACAGCTATGACGTAAAATCAAGTCCACCRCG
* The primers can be sequenced using standard M13 forward and reverse sequencing primers. In the degenerate reverse primer the „R“ represents any purine (i.e. either adenine or guanine)
More information on the primers can be found here.
Agarose gel electrophoresis
- Standard gel electrophoresis system
- General electrophoresis power pack
- Loading dye
- DNA marker (e.g. 100 – 4k bp marker)
Sample collection
- Working individually or in teams of two or three, each individual/team member collects and processes one plant sample.
- When collecting your plant sample, use the DNA Barcoding Sample Collection Record sheet to record the information about the sample(s) you collect.
- Most importantly, label the tube or vessel you use to store it in with your unique “Sample identification number” (“SampleID”) so it can be distinguished from other DNA barcoding samples.
- Ensure you close the tube or vessel tight and store it in a cool place until you use it to extract DNA in the wet-lab.
DNA extraction
Direct PCR protocol
1. Take one 1.5 ml Eppendorf tube per sample and label with the sample number. Add 20 μl Extraction Buffer to each tube.
2. Prepare your plant sample(s) as follows:
Plant leaf
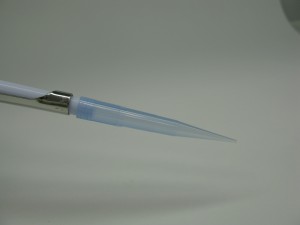
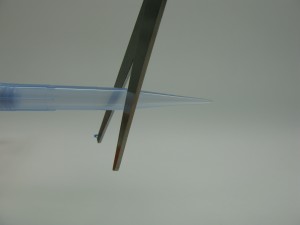
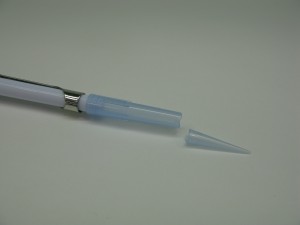
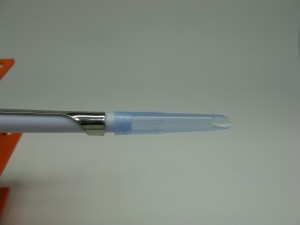
Take a P1000 pipette tip and cut it off straight at the point where it has a 2 mm diameter (Rainin tips: cut off midway between the graduation mark and the point of the tip) (Fig. 1-3).
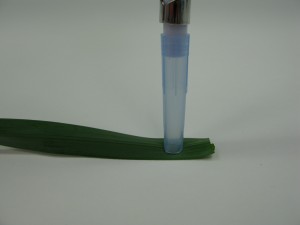
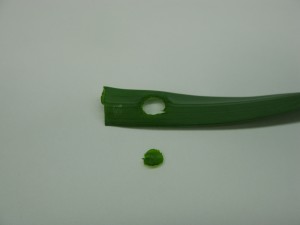
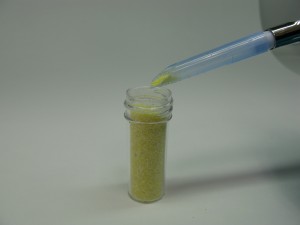
Place the leaf into the lid of your Falcon collection tube and use the pipette tip as puncher to cut out a 2 mm disc (around 5 mg) of the leaf (Fig. 4-5).
Hard plant material such as seed or root
Take amount approximating material with 2 mm diameter. Using a micropestle, disrupt the material as best as possible.
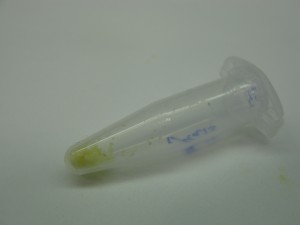
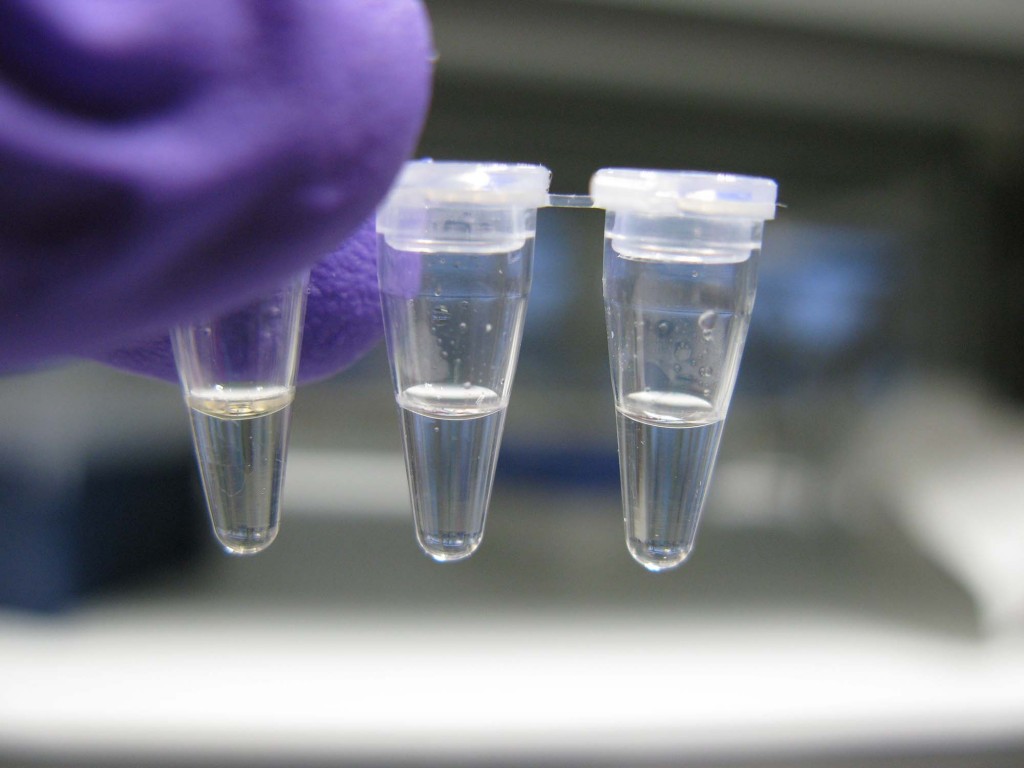
3. Place the 2 mm leaf disc/plant material into the Extraction Buffer-containing tube (cf. Fig. 6). Briefly mix the sample and buffer by vortexing or tapping the tube.
4. To allow cell lysis and DNA release, incubate your sample for 3 minutes at room temperature. Cf. Fig. 7
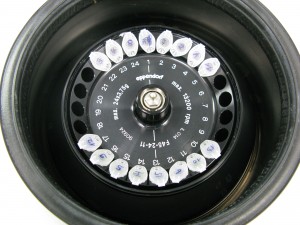
5. Centrifuge the lysate for 3 minutes at 20,000 x g (14,000 rpm). Cf. Fig. 8
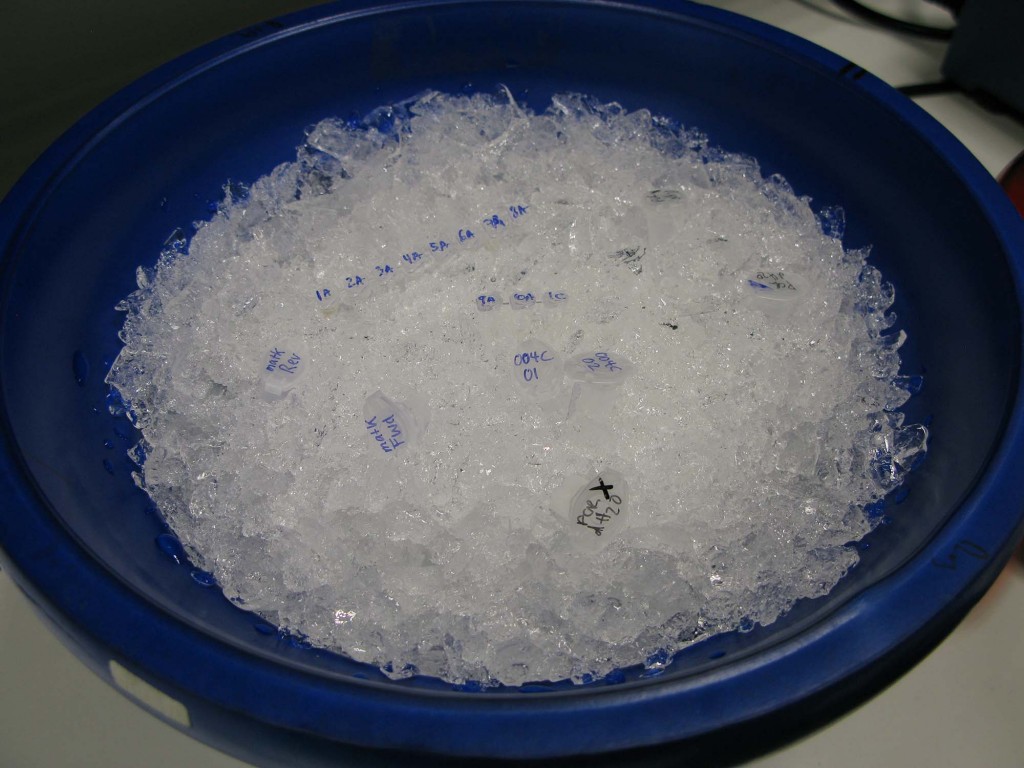
6. Label one new 1.5 Eppendorf tube per sample. Transfer as much of the lysate as possible into the fresh tube without disturbing the pellet. Keep your extracted DNA on ice. Cf. Fig. 9
The DNA lysate will be stable for several weeks if stored at -20°C.
Spin-column protocol
1. Prepare your sample as follows:
Leaf sample
Take a P1000 pipette tip and cut it off straight at the lowest mark (Fig. 1a-3a).
Place the leaf into a weighing boat and use the pipette tip as puncher to cut out a 5 mm disc (around 12 mg) of the leave (Fig. 4a-5a).
Place the leaf disc into a 1.5 ml Eppendorf tube labelled with your sample number (Fig. 6a).
Flour sample
Take a P1000 pipette tip and cut it off angularly at the lowest mark (Fig. 1b-2b).
Using the pipette tip as spatula, fill approx. 15 mg of flour into a 1.5 ml Eppendorf tube labelled with your sample number (filling the bottom 3-5 mm of the tube corresponds to approx. 15 mg) (Fig. 3b-4b).

The following steps describe the experimental procedure if you use the Qiagen® DNeasy® Plant Mini Kit but there are other commercially available kits that will work as well.
2. Add 400 μl Buffer AP1 and 4 μl RNase A stock solution to the Eppendorf tube and precede as follows:
Leaf sample
Using a micropestle, disrupt the leave as best as possible.
Flour and leaf sample
Vortex the sample vigorously. If there are any big clumps visible, vortex or pipet further to remove them.
3. To lyse the cells, incubate the sample for 10 minutes at 65°C. Mix 3 times during incubation by flicking the tube several times. Cf. Fig. 7
4. To precipitate the detergent, proteins and polysaccharides, add 130 μl Buffer P3 to the lysate, mix, and incubate for 5 minutes on ice. Centrifuge the lysate for 5 minutes at 20,000 x g (14,000 rpm). Cf. Fig. 8
5. Label a purple QIAshredder Mini spin column (on the lid) and the collection tube it is placed in (on the side) with a permanent marker. Cf. Fig. 9
Pipet the lysate into the QIAshredder Mini spin column. Centrifuge for 2 minutes at 20,000 x g (14,000 rpm).
6. Transfer the flow-through fraction in the collection tube into a fresh, labelled Eppendorf tube without disturbing the cell-debris pellet at the bottom of the collection tube. Typically 450 μl of lysate is recovered. In case a smaller volume is obtained, determine the volume for the next step.
7. Add 1.5 volumes of Buffer AW1 to the cleared lysate, and mix immediately by pipetting. For example, to 450 μl lysate, add 675 μl Buffer AW1. Reduce the amount of Buffer AW1 accordingly if the volume of lysate is smaller.
8. Label a white DNeasy Mini spin column and the collection tube it is placed in. Pipet 650 μl of the mixture into the DNeasy Mini spin column. Centrifuge for 1 minute at ≥6000 x g (≥8000 rpm), and discard the flow-through. Make sure you set the centrifuge to the right speed at this step.
9. Reuse the collection tube to repeat the centrifugation step with the remaining sample in your Eppendorf tube. Afterwards, discard the flow-through and collection tube but not the spin column.
10. Place the DNeasy Mini spin column into a new, labelled collection tube, and add 500 μl Buffer AW2. This is a washing step to remove contaminants and to obtain pure DNA. Centrifuge for 1 minute at ≥6000 x g (≥8000 rpm). Discard the flow-through and reuse the collection tube in the next step.
11. Add 500 μl Buffer AW2 to the DNeasy Mini spin column. Centrifuge for 2 minutes at 20,000 x g (14,000 rpm) to dry the membrane.
12. Remove the DNeasy Mini spin column from the collection tube carefully so the column does not come into contact with the flow-through. Discard the flow-through and the collection tube. Transfer the DNeasy Mini spin column to a fresh, labelled Eppendorf tube.
In the next steps, the DNA is eluted from the membrane. The eluted DNA will serve as template in the subsequent PCR reaction.
13. To elute the DNA, pipet 100 μl Buffer AE directly onto the DNeasy membrane. Incubate for 5 minutes at room temperature (15–25°C). Then centrifuge for 1 minute at ≥6000 x g (≥8000 rpm) to elute.
14. Repeat the last step once using the same collection tube, this time eluting with 50 μl Buffer AE.
DNA amplification
Direct PCR protocol
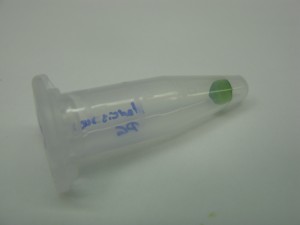
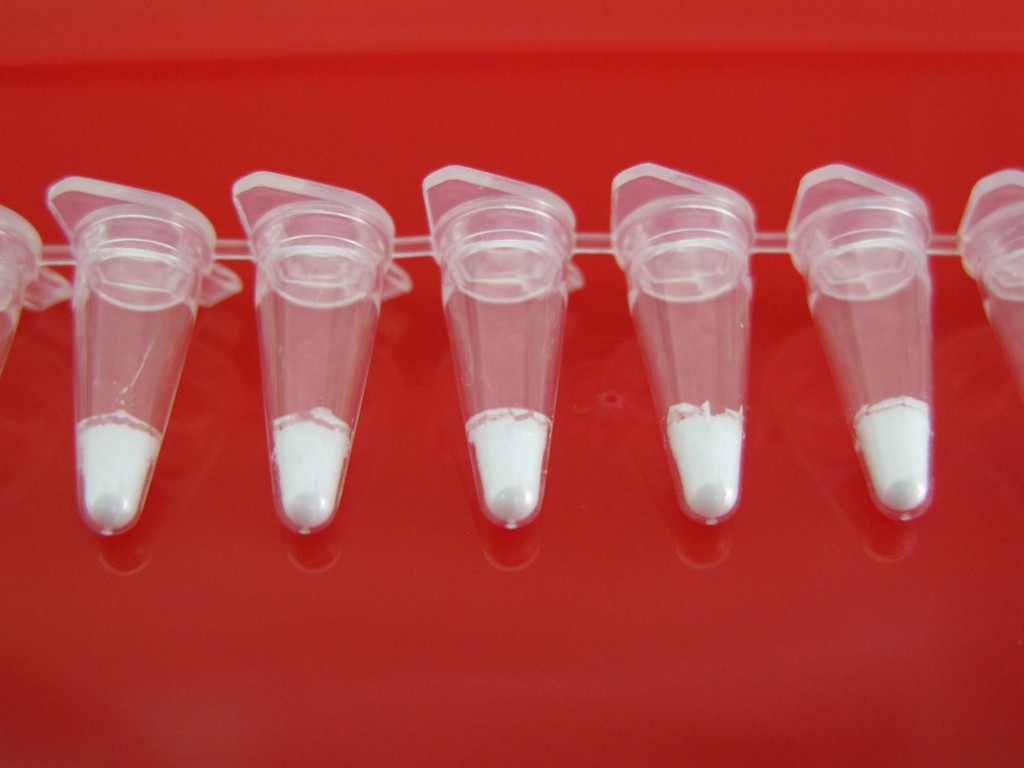
The Jena Bioscience Direct PCR Lyophilised Master Mix (cf. Fig. 10)
comes distributed in PCR tubes and contains dNTPs, DNA polymerase,
buffers, stabilisers and BSA. An “additives mix“ in solution (supplied with the kit), DNA template, primers and RNase-free distilled water have to be added. In our case, the amount of lyophilisate is designed for the use of 50 μl PCR reaction volumes. It is recommended to use around 100 ng of DNA as PCR template for a 50 μl reaction volume. We are running two PCR reactions per sample to amplify both rbcL and matK barcodes, respectively.
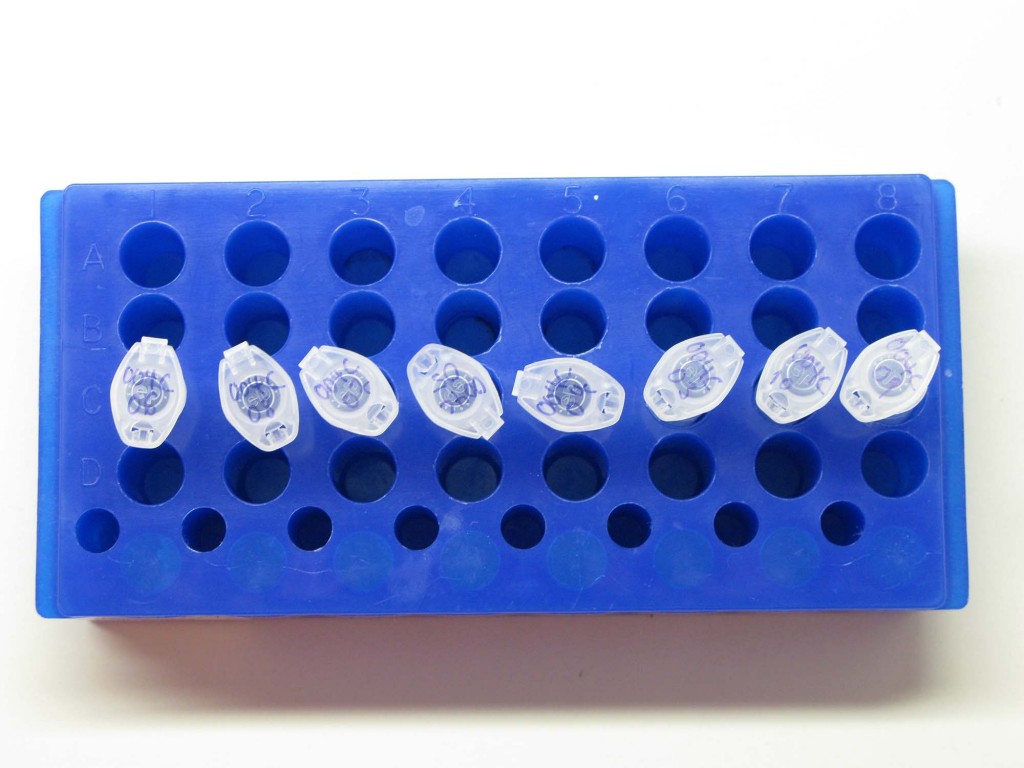
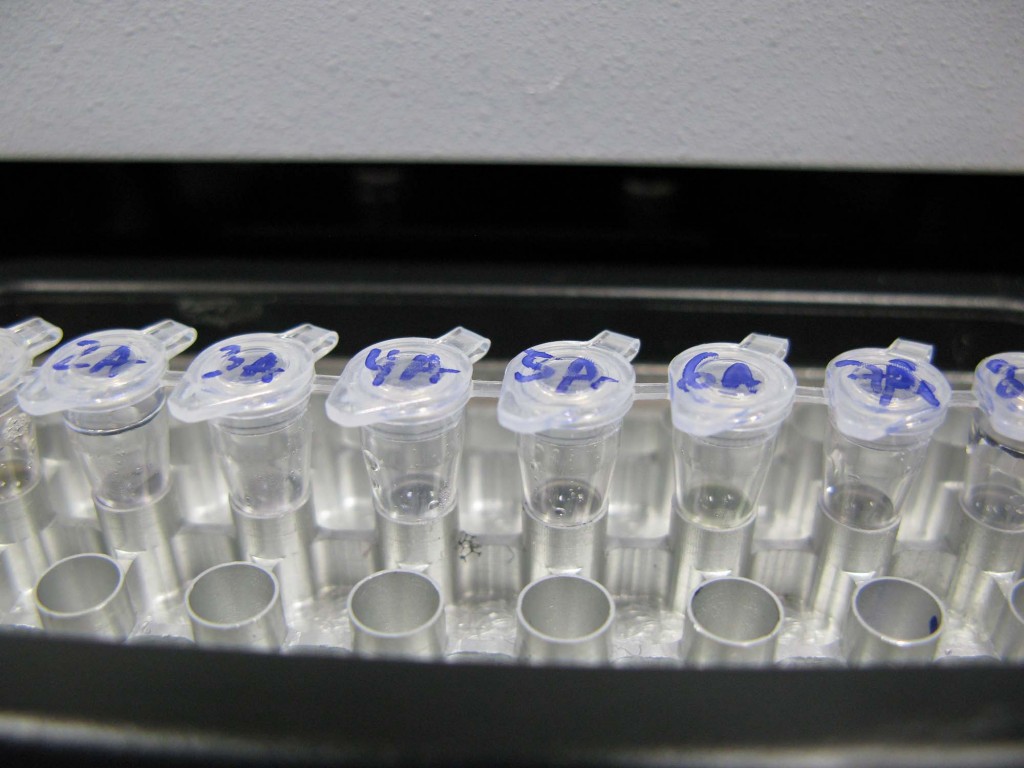
7. Per sample, label two PCR tubes on the side and on the top as follows:
1) Sample name + rbcL
2) Sample name + matK
8. For the whole group, prepare two mastermixes – one for all rbcL reactions, one for all matK reactions – in 1.5 Eppendorf tubes as shown in the table below.
Add all mastermix components to the tube, vortex gently to mix and then centrifuge the tube for a few seconds to bring the components to the bottom of the tube.
| 50 μl reaction (per tube) | Volume per tube | 4X Mastermix |
| Direct PCR Lyophilisate | 1x | – |
| Additive Mix | 25 μl | 100 μl |
| Forward plant primer (0.4 μM final conc.) | 2 μl | 8 μl |
| Reverse plant primer (0.4 μM final conc.) | 2 μl | 8 μl |
| Template DNA | 2 μl | – |
| RNase-free dH2O | 19 μl | 76 μl |
9. Now add 48 μl of the appropriate mastermix to your PCR tube containing the PCR lyophilisate. Do not mix the tube contents until you have added the template.
Add 2 μl of the appropriate template DNA. Ensure you pipette the DNA straight into the mastermix solution. Gently pipette up and down to make sure you released all DNA solution from the tip.
10. Snap the lid onto the tube. Vortex gently to mix and then centrifuge.
The reaction should now be fully dissolved, mixed and appear clear.
Cf. Fig 11
11. Keep the reaction on ice until you place the PCR tube in the thermal
cycler.
Thermal cycling
Place the PCR reactions in the thermal cycler (cf. Fig. 12) and run the following PCR programme:
| Initial denaturation | 94°C 1 min | 1 cycle |
| Denaturation | 94°C 15 sec | 35 cycles |
| Annealing | 63°C 15 sec | |
| Extension | 72°C 30 sec | |
| Preservation | 4°C ∞ |
Spin-column protocol
PCR beads normally contain dNTPs, DNA polymerase, buffers, stabilisers and BSA. DNA template, primers and distilled water have to be added. One bead is designed for use in a 25 μl reaction volume (depends on type of PCR beads used). As we will use a reaction volume of 50 μl per tube, two beads will be added to a single tube. It is recommended to use around 100 ng of DNA as PCR template for a 50 μl reaction volume.
15. Label a PCR tube on the side and on the top. If necessary, gently tap the PCR tube against a hard surface to force the PCR beads to the bottom of the tube.
16. For each reaction, add the following to the PCR tube:
| 50 μl reaction | Volume |
| PCR bead | 2x |
| Forward plant primer (0.2 μM final conc.) | 1 μl |
| Reverse plant primer (0.2 μM final conc.) | 1 μl |
| Template DNA | 2 μl |
| RNase-free dH2O | 46 μl |
Note: Do not mix the tube contents until all the components have been added to the tube.
17. Snap the lid onto the tube and mix the contents by gently flicking the tube with a finger. Vortex gently and then centrifuge the tube for a few seconds to bring the components to the bottom of the tube. The reaction should now be fully dissolved, mixed and appear clear.
18. Keep the reaction on ice until you place the PCR tube in the thermal cycler.
Thermal cycling
Place the PCR reaction in the thermal cycler and run the following PCR programme:
| Initial denaturation | 94°C 1 min | 1 cycle |
| Denaturation | 94°C 15 sec | 35 cycles |
| Annealing | 54°C 15 sec | |
| Extension | 72°C 30 sec | |
| Preservation | 4°C ∞ |
DNA visualisation
Direct PCR protocol
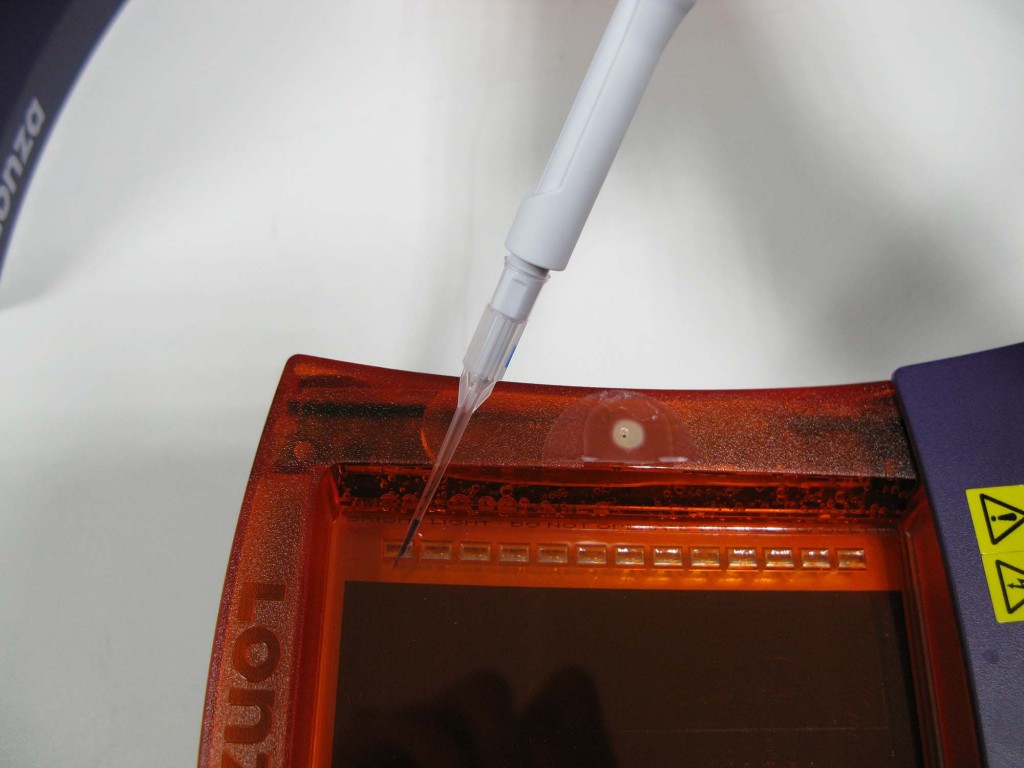
12. Label one fresh 1.5 ml Eppendorf tube per sample and add 1.5 μl FlashGel loading dye to each.
13. Pipette 4.5 μl PCR sample* into the same tube and mix with the loading dye by gentle pipetting. Keep the remaining PCR sample on ice.
14. Load 5 μl sample-dye mix into a selected well of the agarose FlashGel. (Make also sure the first well of the gel is loaded with 3 μl DNA marker) Cf. Fig. 14
15. Separate the PCR products at 240 Volts for 7 minutes, following the manufacturer‘s instructions.
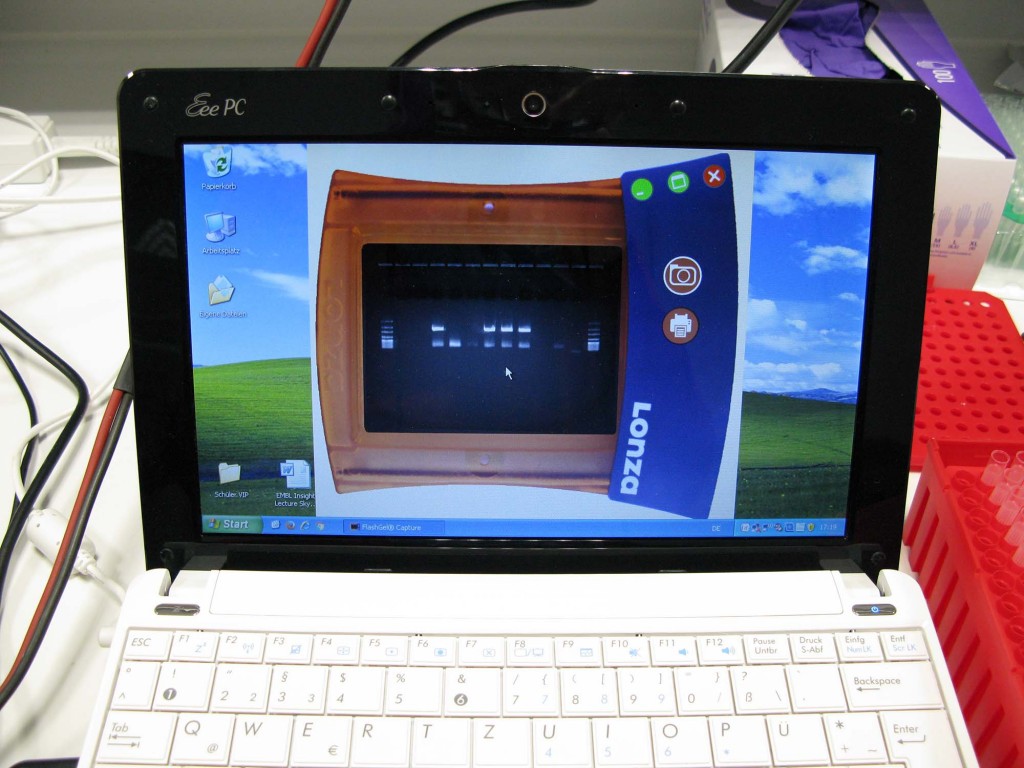
16. View the DNA separation in real time and determine whether your PCR reaction produced a DNA band on the gel (cf. Fig. 15).
17. In case the PCR was successful, move your remaining PCR sample into a tube as specified by your sequencing service (e.g. 1.5 ml Eppendorf tube) and label appropriately.
18. Your sample is now ready to be sent off for PCR clean-up** and DNA sequencing.
* If you are using standard agarose gel electrophoresis, the amount of sample per well might need to be increased.
** PCR clean-up can be carried out by most sequencing services. However, if you would like to do this yourself, there are kits available which provide all reagents and a protocol, such as the SAP-Exo kit by Jena Bioscience or the QIAquick PCR purification kit by Qiagen.
Spin-column protocol
19. Label one fresh 1.5 ml Eppendorf tube per sample and add gel loading dye to each.
20. Pipet PCR sample into the same tube and mix with the loading dye by gently pipetting.
21. Load sample-dye mix into a selected well of the agarose gel. (Make also sure the first well of the gel was loaded with DNA marker.)
22. Separate the PCR products according to the manufacturer’s instructions of your device.
23. Monitor the DNA separation and determine whether your PCR reaction produced a DNA band on the gel.
24. In case the PCR was successful, move your remaining PCR sample into a tube as specified by your sequencing service (e.g. 1.5 ml Eppendorf tube) and label appropriately.
25. Your sample is now ready to be sent off for PCR clean-up and DNA sequencing.
DNA sequencing
After confirming you have successfully amplified your specified gene(s), your DNA sample is ready for DNA sequencing. Simple Sanger sequencing of the full amplicon will be sufficient. This could either be done in any research lab equipped with Sanger sequencing machines or using a commercial sequencing service. Those services are fairly affordable and offer sequencing of PCR products for around 5-12 Euros. Depending on the service offered, you might need to clean-up/purify your PCR product before sequencing to remove any PCR reagents and salts still in your sample mixture. Please note that EMBL cannot offer clean-up or sequencing services.
Activity navigation
Sample collection and wet-lab
Bioinformatics
Share: