| 🖥 | Let other conference participants know when you are available for a live poster presentation and discussion by scheduling a live video poster presentation. |
| 📆 | It is possible to schedule multiple sessions within as well as outside of the scheduled poster sessions during the conference. |
| ⛔️ | Please do not use any other features or make any other changes than described below. |
STEP 1: Create a session
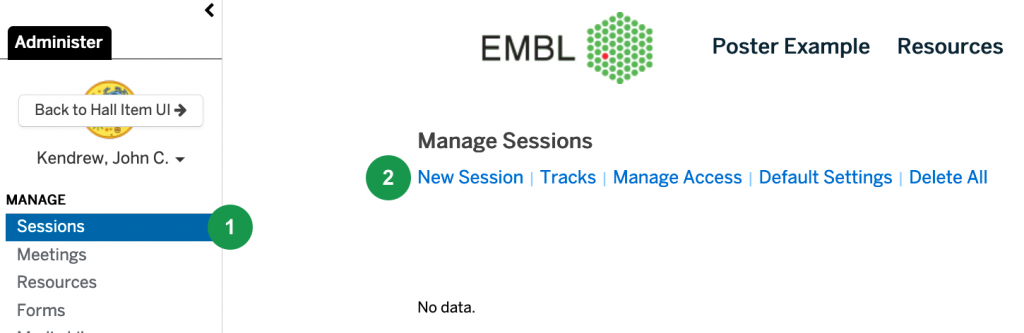
To set up a live video poster presentation, from the “MANAGE” menu on the left, go to “Sessions” (1) and click “New Session” (2).
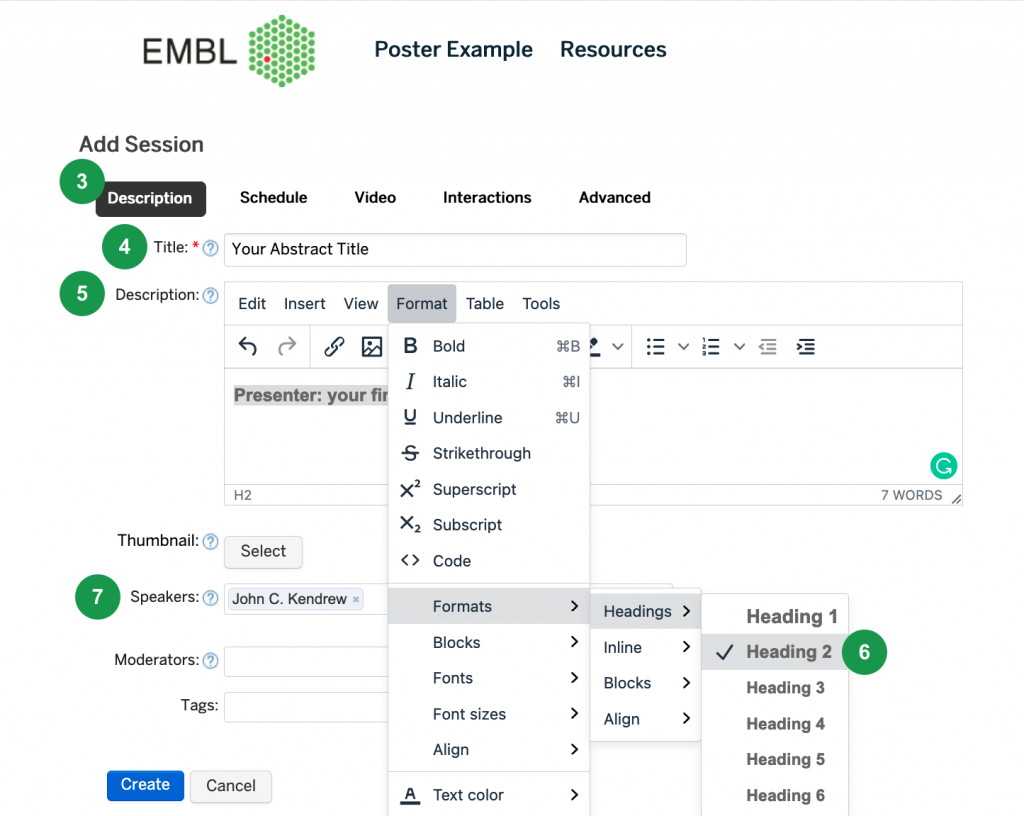
The “Add Session” menu will appear. In the “Description” tab (3), only fill in the fields:
- “Title:” insert your abstract title (4)
- “Description:” insert “Presenter: your first name and last name”, eg Presenter: John C. Kendrew (5),
ensure to use Heading 2 formatting in Format>Formats>Headings menu (6) - “Speakers:” search and add yourself (7)
STEP 2: Schedule the session
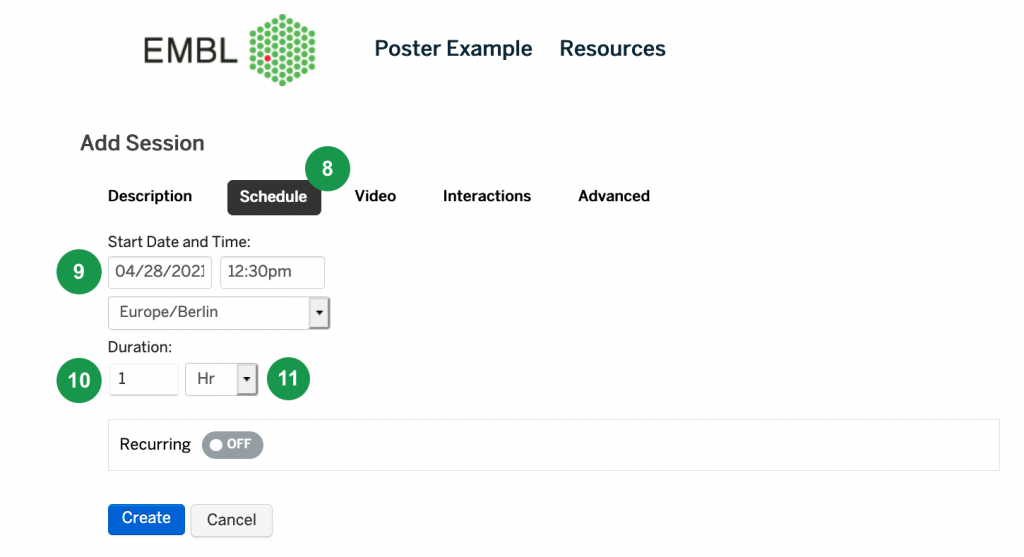
Next, go to the “Schedule” tab (8), indicate the start date, time (9) and duration (10), as minutes or hours (11), for when you will be presenting your poster.
| 💡 | Tip: It is recommended that you schedule the slot of approximately 30-min during the poster sessions. This will enable you to present your own poster and also view other poster presentations for the rest of the poster session. |
STEP 3: Set-up the audio-video conference
For the video settings, you can select between:
A. Zoom Meeting (preferred option, we recommend you use this if you have a Zoom account)
| ❗️ | You need a Zoom account (a basic free account is sufficient) to be able to use the Zoom Meeting option. First, schedule a meeting in your Zoom account. Please make sure that your Zoom settings are set the way that the meeting link you generate includes embedded password. |
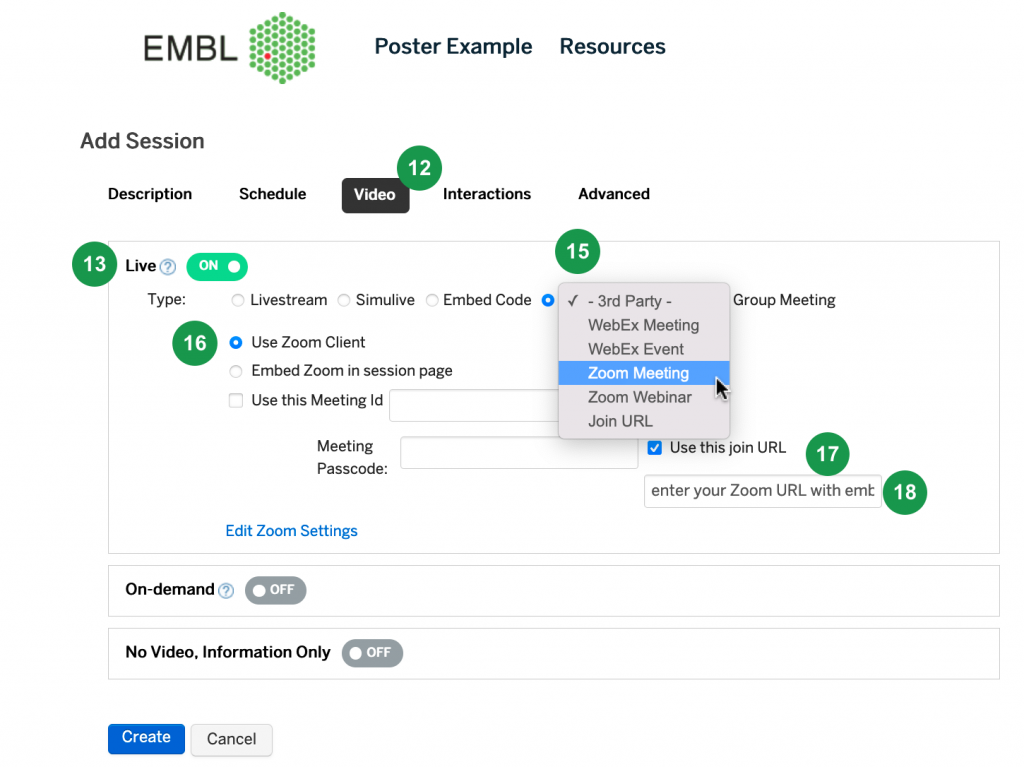
Go to the “Video” tab (12), enable Live to be switched “ON” (13) and select under “-3rd Party-” “Zoom Meeting” (15), turn on “Use Zoom Client” (16), tick the box “Use the join URL” (17) and paste in your Zoom Meeting link with embedded password in the text field below (18).
| ❗️ | Do not use “Use this Meeting ID” and “Meeting Passcode” as this option currently does not work. |
A. "Group Meeting" (built in the platform, no third party account needed)
Go to the “Video” tab (12), enable “Live” to be switched “ON” (13) and select “Group Meeting” (14).
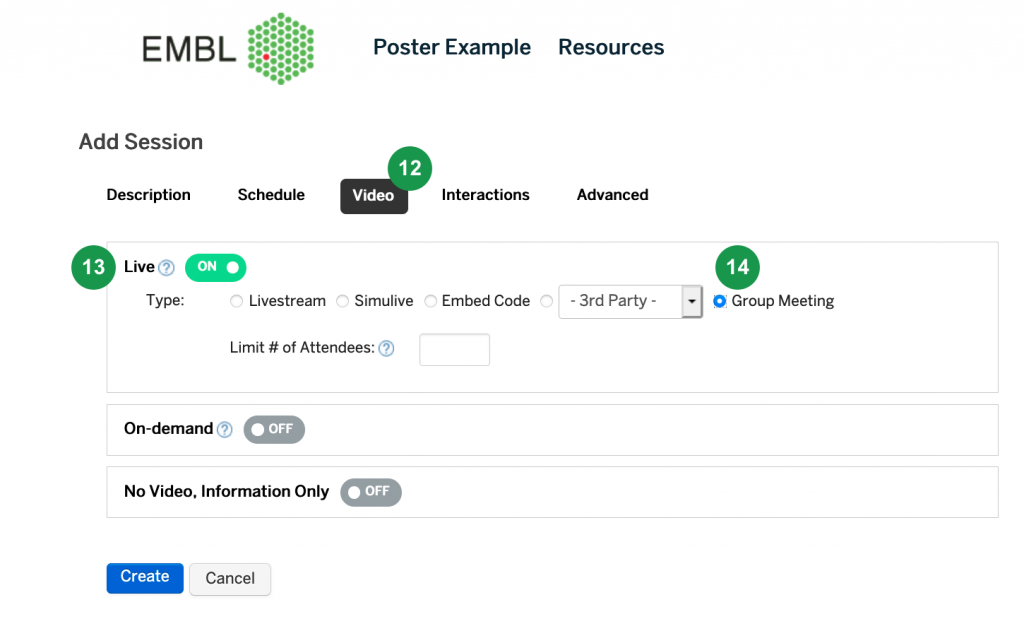
If you use Group meeting please test it before the conference.
Make sure you have enabled camera, microphone, or screen sharing permissions for the browser you are using for the conference platform.
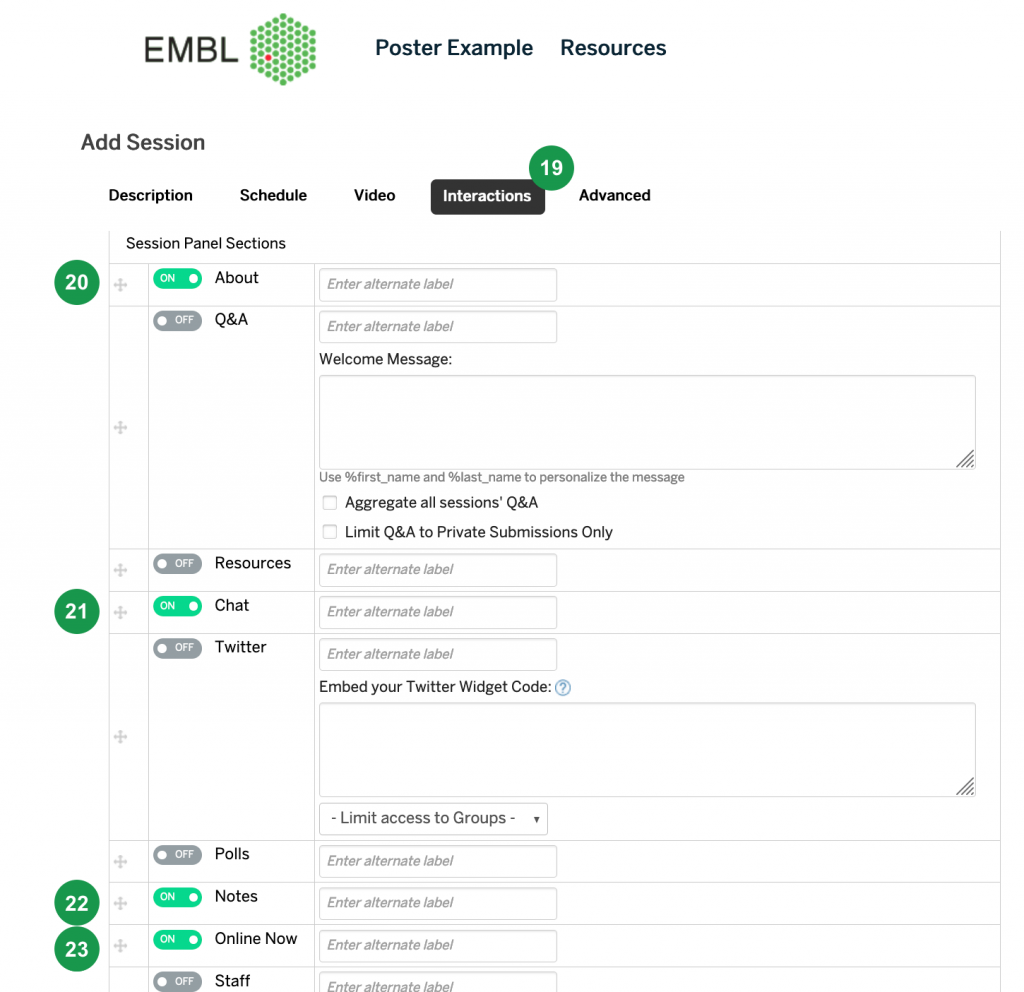
STEP 4: Select interaction tabs
Next, in the “Interactions” tab (19), ensure to turn “ON” the following functions: “About” (20), “Chat” (21), “Notes” (22) and “Online Now” (23).
No further configurations are needed otherwise.
Step 5: Advanced settings
Finally, in the “Advanced” (24) tab, tick the “Enable RSVP” box (25), then click on “Create” (26) to complete the set up.
Do not make any other changes in the Advanced settings as they may prevent your live poster presentation slot from being visible to participants.
